 Save to Pinterest
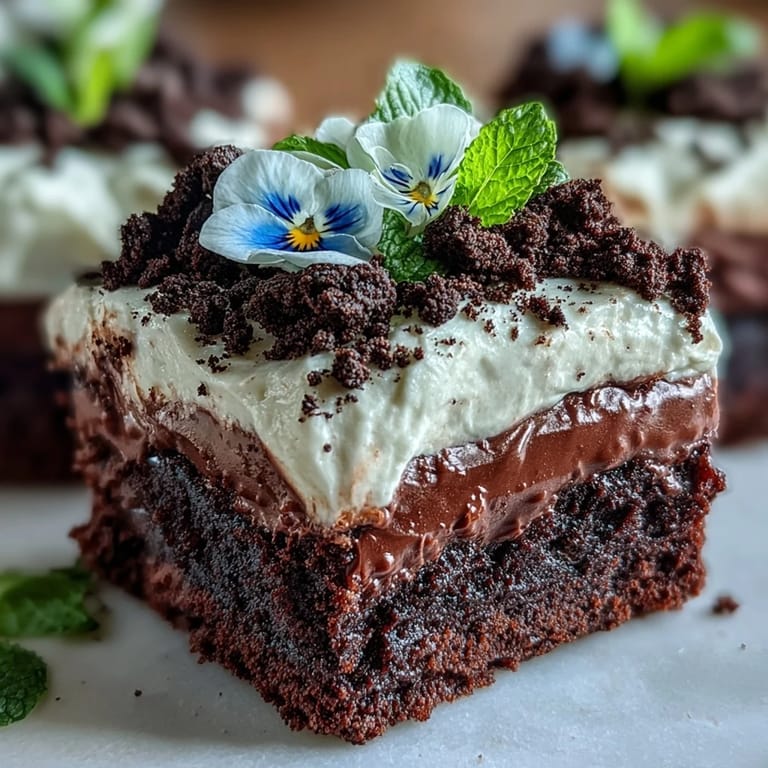
 The cheerful clatter of tiny flower pots scattered across my kitchen counter marked the start of my playful adventure with these brownies. The idea came to me while browsing a garden center with my mother one spring, both of us drawn to vibrant blooms and laughing about our indoor plant mishaps. Inspired by her love of whimsical details, I decided to hide one of her favorite desserts inside the very pots she loves—brownies dressed up as a miniature edible garden. There’s something delightful about seeing guests’ faces when they realize the dirt is crumbled Oreos. It’s a dessert that brings surprise and smiles in equal measure.
One spring, my niece insisted on planting gummy worms instead of actual flowers while we assembled these pots for my mom’s brunch. We all ended up with chocolate-streaked fingers, slightly wonky decorations, and a table full of laughter. Even my dad, notorious for skipping desserts, tried to claim an extra 'mineral sample' from the garden. I’ve found these brownies somehow encourage everyone to play a little, no matter their age. They became a highlight of our Mother’s Day traditions from that afternoon onward.
Ingredients
- Unsalted butter: Melting real butter gives the brownies their fudgy, indulgent richness—microwaving works in a pinch, but a gentle pan melt adds more control.
- Granulated sugar: I learned that creaming this in properly is worth the extra minute, delivering that signature shiny-crackle top everyone adores.
- Large eggs: Crack them in one at a time and whisk fully—your brownies will be lighter and less dense.
- All-purpose flour: Don’t over-mix or you’ll risk a tough crumb—fold it in with a soft spatula until just combined.
- Unsweetened cocoa powder: Sift this with the dry goods; it’s the best way to avoid stubborn lumps.
- Baking powder: This helps the batter rise just enough so the ‘dirt’ will sit perkily on the surface.
- Salt: A tiny bit intensifies the chocolate flavor—use fine salt for even distribution.
- Vanilla extract: The aroma alone makes the whole kitchen feel like a special occasion—add at the end of mixing for the brightest flavor.
- Oreo cookies: I leave the cream filling in; it helps the crumbs stick together, making your ‘soil’ more convincing.
- Heavy cream: Whips up to a dreamy topping—chill the bowl and whisk for quicker results.
- Powdered sugar: This sweetens and helps stabilize the whipped cream so it doesn’t sink under the weight of the dirt.
- Edible flowers or colorful gummies: Bring a whimsical flourish to the finished pots—always double-check that any flowers are safe to eat!
- Fresh mint leaves (optional): Bright green mint leaves nudge the look further into ‘mini garden’ territory and give a hint of freshness.
Tired of Takeout? 🥡
Get 10 meals you can make faster than delivery arrives. Seriously.
One email. No spam. Unsubscribe anytime.
Instructions
- Prep the bakeware:
- If you’re using mini flower pots, line the bottoms with parchment circles—any cracks make for dramatic (and delicious) leaks.
- Melt and mix:
- Warm the butter in a small pan, then whisk in the sugar and vanilla until glossy and fragrant.
- Add the eggs:
- Crack eggs in, one at a time; whisk until fully combined and the mixture looks smooth and thick.
- Dry ingredients marry in:
- Sift the flour, cocoa, baking powder, and salt together, then fold gently until just incorporated with no streaks left.
- Fill the pots:
- Spoon batter evenly into flower pots or spread in a lined tray, smoothing tops without fussing for perfection.
- Bake to fudgy perfection:
- Bake at 175°C for about 20–25 minutes; look for slightly moist crumbs on your tester and resist overbaking for pure gooeyness.
- Make your dirt:
- Crush the Oreos (cream in and all) to a fine rubble—either pulse in a processor or bash in a bag with a rolling pin for stress relief.
- Whip the cream:
- Beat heavy cream and powdered sugar to stiff peaks, stopping just as it’s able to hold swoops and curls.
- Assemble the gardens:
- If using a tray, trim brownies to nestle in each flower pot base, then layer with whipped cream and blanket with crushed Oreo soil.
- Decorate and chill:
- Adorn with edible flowers or candy blooms, tuck in mint leaves, and chill the completed pots until ready to serve.
 Save to Pinterest
 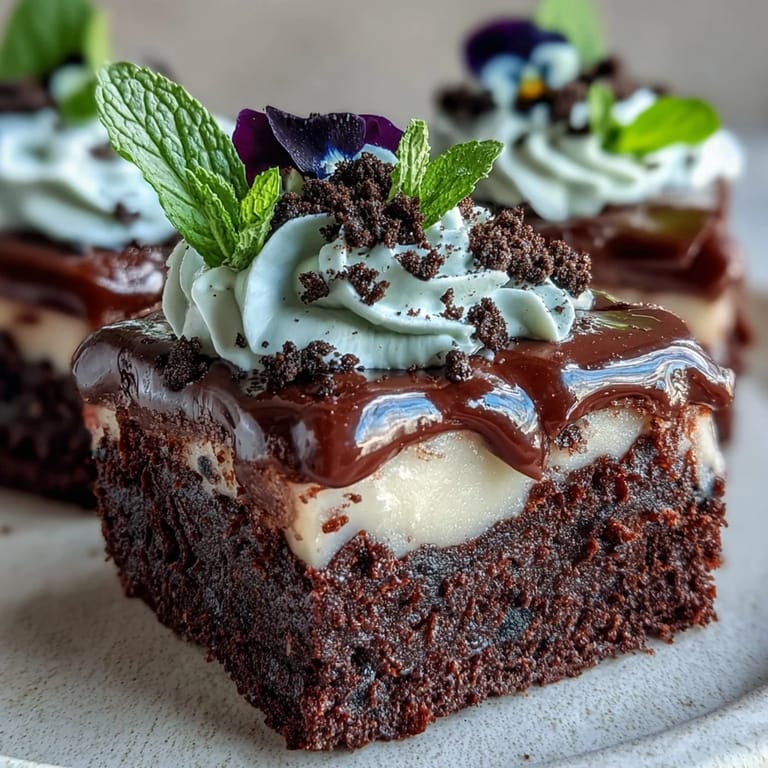 Save to Pinterest
 The first time we served these at brunch, my mom mistook them for real potted plants and actually tried to water one. Her shriek followed by delighted laughter is a moment I’ll never forget—and proof that simple, silly desserts can anchor our most joyful gatherings.
Choosing the Right Flower Pots
Experimenting with different containers showed me that unglazed, oven-safe mini clay pots add the most charm and bake the brownies evenly. Just remember to scrub them thoroughly (new pots can be dusty) and line the base with parchment to avoid leaks or sticking. If you don’t have flower pots, ramekins or sturdy teacups do the job just fine, delivering the whimsy in a different guise.
Edible Flowers: Fun and Cautions
I learned to triple-check that flowers are truly edible—sometimes the prettiest options from the florist are only decorative. Violets, pansies, and nasturtiums are wonderful because they add both color and mild, sweet flavors. Always rinse them gently and pat dry before nestling them onto your brownies for a worry-free, stunning presentation.
Assembly with Kids (and Giggles Guaranteed)
If you’re inviting little helpers into the kitchen, embrace the chaos. Let everyone choose their decorations and expect wild creativity—one year a “garden” wound up with a dinosaur-shaped gummy as the surprise centerpiece! The process is almost guaranteed to end with sticky hands, happiness, and some unexpected masterpieces.
- Tuck a little piece of parchment into pot bases for leak protection.
- Chill the finished pots to help whipped cream and flowers set prettily.
- Don’t stress about perfect layers—wonky gardens are the most memorable.
 Save to Pinterest
 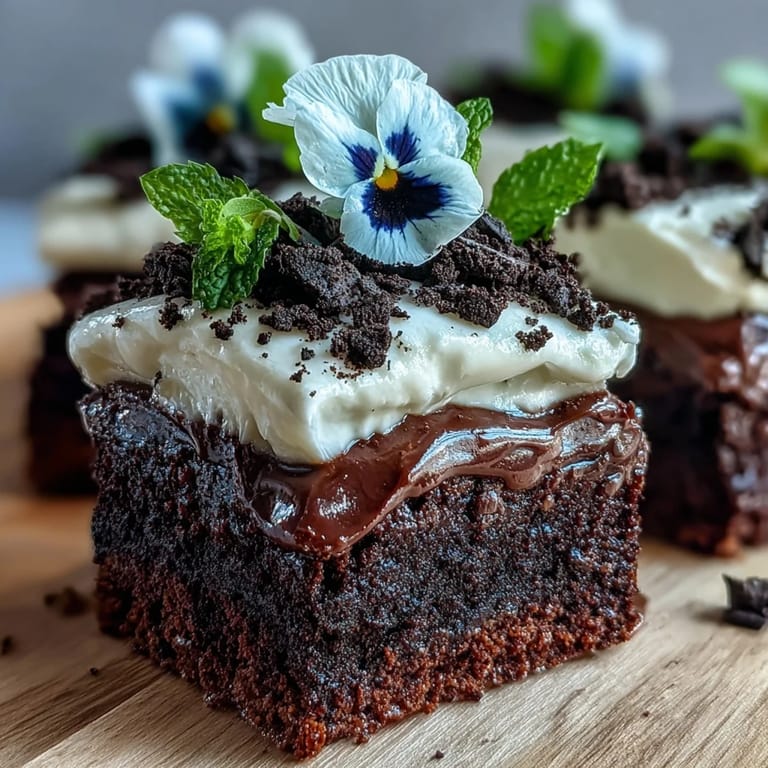 Save to Pinterest
 Each flower pot brownie is a sweet celebration tucked inside a playful disguise—perfect for surprising someone you love or simply brightening up any spring table.
Recipe FAQs
- → How long should I bake brownies in mini flower pots?
Bake at 175°C (350°F) for 20–25 minutes, or until a toothpick comes out with moist crumbs. Smaller pots may bake faster; check at 18 minutes to avoid overbaking.
- → Can I use a baking tray instead of oven-safe pots?
Yes. Bake in a lined baking tray, let cool completely, then cut rounds or squares to fit each pot. Lining with parchment makes removal easier if you want neat shapes.
- → How should I store the finished pots and how long do they keep?
Store chilled in an airtight container for up to 3 days. For best texture, assemble the whipped cream and Oreo crumbs close to serving time so the crumbs stay crisp.
- → Are edible flowers safe to use?
Use known food-safe varieties like pansies or violets and source them from reputable grocers or farmers' markets. Rinse gently and avoid flowers treated with pesticides; gummies or mint make safe alternatives.
- → Can I make dairy-free or egg-free versions?
Yes. Swap butter for plant-based margarine, use a non-dairy whipping alternative, and replace eggs with a commercial egg replacer or flax egg. Baking time and texture may vary slightly.
- → Any tips to keep the base from getting soggy?
Allow brownies to cool fully before adding whipped cream and crumbs. Chill assembled pots to set the cream and maintain a clear contrast between moist brownie and crunchy Oreo 'dirt'.