 Save to Pinterest
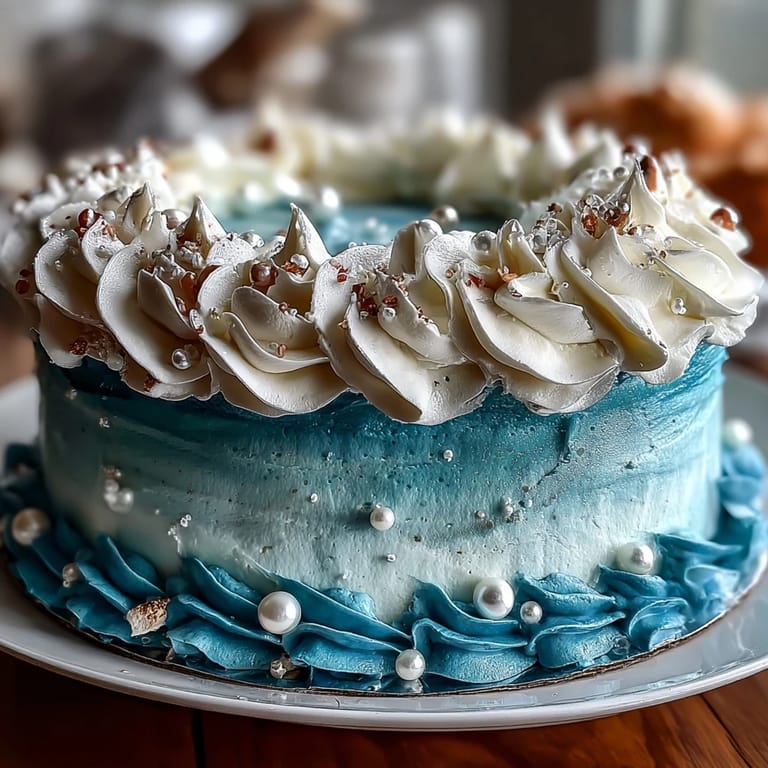
 My sister came home with a new zodiac book, and we spent an entire afternoon flipping through it while eating cake straight from the pan—terrible manners, but that's what sisters do. When we landed on Pisces, with its dreamy water symbolism, I thought: what if I could bake that feeling? This cake became my answer, a vanilla canvas that would let me paint the ocean in buttercream, all blue gradients and swooping waves that somehow made her smile wider than any store-bought cake ever could.
I made this for a friend's birthday party on a sticky July evening, and something about piping those white foam swirls on top made me lose track of time completely. One moment I was stressed about getting it done, the next I was giggling at how the waves actually looked like waves, and suddenly it wasn't just cake anymore—it was this little edible world we'd created together, and people kept taking pictures of it before they even ate it.
Ingredients
- All-purpose flour (2 ½ cups): The foundation of a tender crumb; make sure to measure by spooning and leveling, not scooping straight from the bag, because that tiny difference changes everything.
- Baking powder (2 ½ tsp): This gives you that gentle rise—not a puffy volcano cake, just a perfectly level surface for your ocean waves.
- Salt (½ tsp): Sounds minimal, but it brightens the vanilla flavor so the cake doesn't taste flat or one-dimensional.
- Unsalted butter (1 cup for cake, 1 ½ cups for frosting): Room temperature is non-negotiable here; cold butter won't cream properly, and you'll end up with a dense cake instead of a fluffy one.
- Granulated sugar (1 ¾ cups): The beating time with butter matters—those three minutes of creaming is when air gets incorporated, and that air is what makes this cake tender.
- Eggs (4 large): Room temperature means they blend smoothly into the batter; straight from the fridge and they'll seize up and create lumps.
- Pure vanilla extract (1 tbsp plus 2 tsp): The real stuff, not imitation, because this simple cake deserves vanilla that actually tastes like something beautiful.
- Whole milk (1 cup plus ¼ cup): Room temperature again—baking really cares about temperature—and the acidity helps tenderize the crumb.
- Powdered sugar (5 cups, sifted): Sifting removes lumps that will make your frosting grainy and unpleasant to spread or pipe.
- Blue gel food coloring (various shades): Gel holds its pigment without adding liquid like liquid food coloring does, which means your buttercream stays the right consistency for piping.
Tired of Takeout? 🥡
Get 10 meals you can make faster than delivery arrives. Seriously.
One email. No spam. Unsubscribe anytime.
Instructions
- Prepare your pan and preheat:
- Get your 9x13-inch pan lined with parchment paper and your oven to 350°F; this only takes a minute but it matters because a preheated oven bakes evenly and you'll actually know when your cake is done.
- Mix your dry ingredients:
- Whisk flour, baking powder, and salt together in a medium bowl—this distributes the leavening throughout so you get even rise instead of weird bumps and dips.
- Cream butter and sugar:
- Beat them for a full three minutes until the mixture looks pale and fluffy, almost like soft serve ice cream; this is where the magic happens and your cake will be tender.
- Add eggs one at a time:
- Drop each egg in, mix it completely before the next one arrives—rushing here means you'll get a curdled-looking batter, but patience gives you a smooth, silky base for your cake.
- Build the batter in alternating additions:
- Start with flour, then milk, then flour again, mixing after each addition until everything just comes together; overmixing at this stage develops gluten and makes your cake tough and chewy instead of tender.
- Bake with confidence:
- Pour the batter into your prepared pan, smooth the top gently, and slide it into the oven for 28-32 minutes until a toothpick comes out clean or with just a few moist crumbs. The kitchen will smell like pure vanilla and warmth—that's your signal you're close.
- Cool strategically:
- Leave it in the pan for ten minutes so it sets enough to handle, then turn it out onto a wire rack to cool completely; rushing this step means your warm cake will crack when you frost it.
- Make the buttercream:
- Beat softened butter on medium speed for two minutes until creamy, then gradually add your sifted powdered sugar on low speed so you don't coat your entire kitchen in a cloud of sugar dust. Add vanilla and milk last, then beat it all until it's smooth and spreadable.
- Tint your frosting:
- Divide the buttercream into three or four bowls and use blue gel coloring to create your palette—deep ocean blue, medium blue, pale aqua, and white—starting with just a tiny dab of color and building up because gel coloring is strong and concentrated.
- Apply the crumb coat:
- Spread a thin layer of white buttercream all over the cooled cake and chill it for twenty minutes; this seals in crumbs so your final decorating looks polished instead of speckled with cake bits.
- Create the ocean waves:
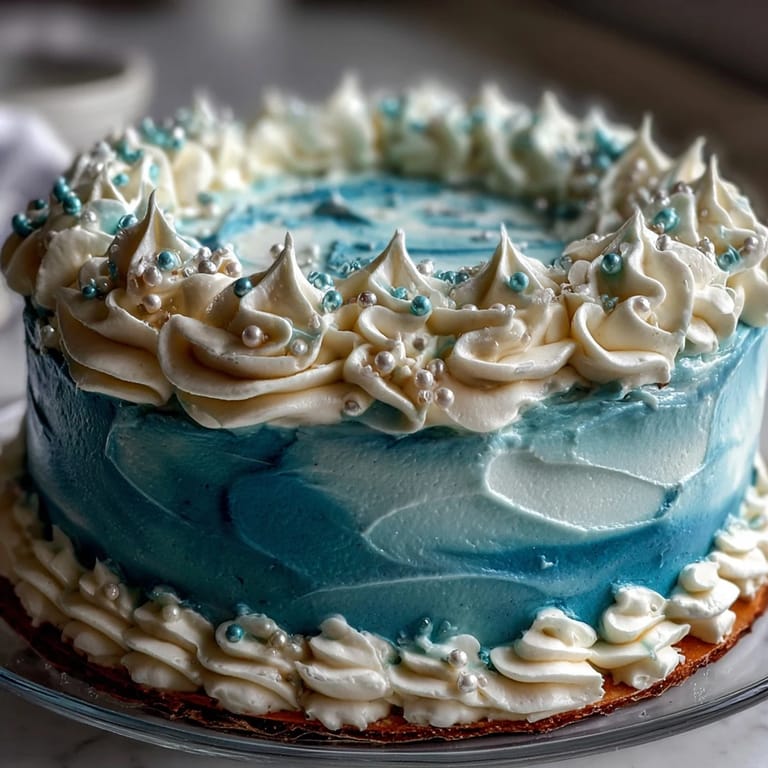
- Using an offset spatula, apply your buttercreams in swooping, wave-like motions, starting with the darkest blue at the base and working up to lighter shades and white at the top; this ombré effect is what makes it look like the sea.
- Pipe the sea foam:
- Use a piping bag with a round or petal tip and white buttercream to pipe foamy swirls and details on top, mimicking how waves break and spray—let yourself play here, because imperfection actually looks more natural and beautiful.
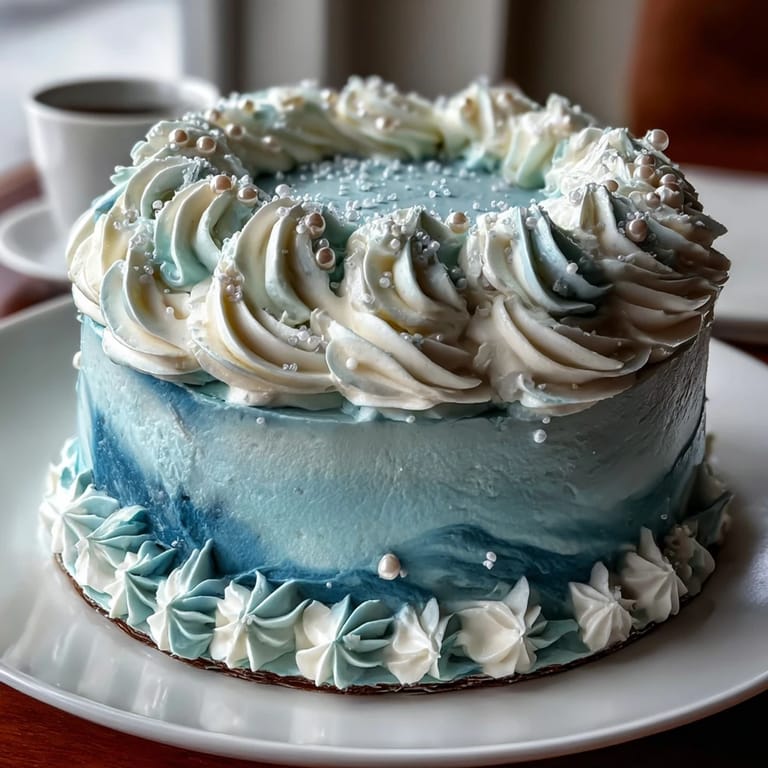
- Add the finishing touches:
- If you want, scatter edible pearls across the top or add a Pisces symbol made from white chocolate or fondant; these details transform it from beautiful to absolutely magical.
 Save to Pinterest
 The best part about making this cake isn't even eating it—it's that moment when someone takes their first bite and you watch their face light up because it actually tastes as good as it looks. That's when you know the waves and the colors and the extra care you took actually meant something.
Flavor Variations to Explore
If vanilla feels too simple, you can add lemon zest to the batter for a bright, summery note that pairs beautifully with the ocean theme—or try almond extract mixed with the vanilla for something more delicate. I've also made this with a hint of white chocolate melted into the buttercream, which adds a subtle richness without changing the color.
Decorating Like You Mean It
The piping doesn't need to be perfect—genuinely, the more organic and slightly uneven your waves look, the more realistic they become. Practice your swooping motions on parchment paper first if you're nervous, or just dive in knowing that any frosting disaster can be smoothed out with an offset spatula and a second attempt.
Storage and Serving Suggestions
This cake keeps beautifully for three days wrapped loosely in plastic wrap at room temperature, though the buttercream texture stays fluffiest if you slice it straight from the fridge. Serve it with sparkling water, a light Moscato, or even just alongside other desserts if this is part of a bigger celebration.
- Chill the finished cake for at least an hour before serving so the buttercream sets and slices stay clean.
- If you're making this more than a day ahead, frost it the night before so the flavors meld and the decoration looks fresh.
- Room temperature cake tastes best, so pull it from the fridge about fifteen minutes before serving if you want the vanilla flavor to really shine.
 Save to Pinterest
 This cake is one of those desserts that reminds you why you started baking in the first place—not for perfection, but for the joy of creating something beautiful that brings people together. Make it, mess it up if you need to, and enjoy every imperfect, delicious moment of it.
Recipe FAQs
- → How do I achieve the blue ombré effect on the frosting?
Divide the buttercream into several bowls and tint each with gel food coloring in varying blue shades, from deep ocean blue to pale aqua. Apply the darkest shade at the base, gradually layering lighter tones upwards for a smooth ombré look.
- → What tips are best for piping ocean waves?
Use round or petal piping tips with an offset spatula to create smooth, swooping motions that mimic the natural curves and flow of ocean waves.
- → Can I prepare the cake ahead of time?
Yes, bake the vanilla sponge and cool completely before applying the buttercream layers. Chill between decorating steps to maintain clean lines and vibrant color contrasts.
- → What alternatives can enhance the vanilla sponge flavor?
Add lemon zest to the batter for a fresh, tangy note that complements the buttercream’s sweetness and the ocean theme.
- → How should I store the cake after decorating?
Keep the cake refrigerated to preserve the buttercream’s texture and color. Bring to room temperature before serving for optimal flavor and softness.