 Save to Pinterest
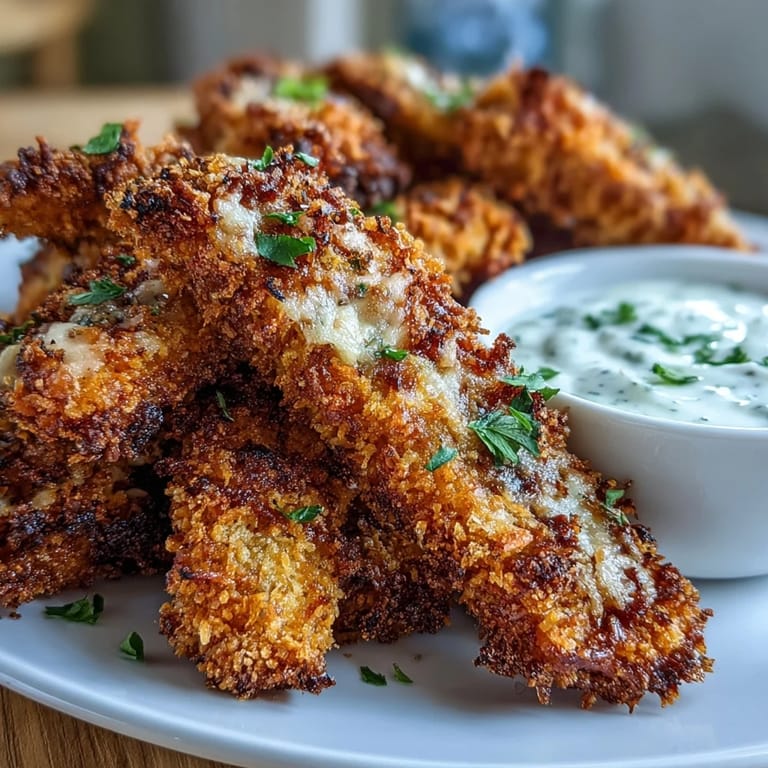
 My kitchen was already sticky with flour when my daughter announced she'd only eat chicken if it looked like fries. That's when these crispy baked strips were born—not from some grand culinary inspiration, but from the simple challenge of making protein fun again. The Parmesan crust came together almost accidentally, when I grabbed what was in the fridge instead of following any recipe. Now they're what she asks for every week, and honestly, I can't blame her.
I'll never forget serving these at a casual potluck where someone's picky seven-year-old tried one, then asked for seconds before anyone else had even sat down. That moment taught me something: food doesn't need to be complicated to make people happy, it just needs to taste good and feel like someone actually cared enough to make it properly.
Ingredients
- Boneless, skinless chicken breasts (500 g): Slice them into fry-shaped strips about half an inch thick—this size matters because it ensures even cooking without drying out the inside.
- All-purpose flour (1/2 cup): This creates the base layer that helps everything stick together; don't skip this step or your coating will slide right off.
- Eggs (2 large) and milk (1 tbsp): The egg mixture is your adhesive, and that splash of milk keeps it from being too thick and gluey.
- Panko breadcrumbs (1 cup): Regular breadcrumbs work, but panko gives you that signature crispy texture that makes these feel restaurant-quality.
- Grated Parmesan cheese (1/2 cup): Fresh from the block is noticeably better than the pre-grated stuff, which contains anti-caking agents that dull the flavor.
- Garlic powder and Italian seasoning (1 tsp each): These bring savory depth without overpowering the cheese and chicken.
- Cooking spray or olive oil (2 tbsp): This is crucial for browning—the oil creates that golden crust you're after.
- Marinara sauce (1 cup): Warm it gently so it's ready when the chicken comes out of the oven.
- Ranch dressing (1/2 cup): The cooling contrast to the hot, savory chicken is what makes people reach for more.
Tired of Takeout? 🥡
Get 10 meals you can make faster than delivery arrives. Seriously.
One email. No spam. Unsubscribe anytime.
Instructions
- Set up your station:
- Preheat your oven to 425°F and line a baking sheet with parchment paper, then give it a light spray or brush of oil. Having everything ready before you start means you won't be scrambling while chicken sits getting soggy.
- Cut and season the chicken:
- Slice your chicken breasts lengthwise into strips about half an inch wide—they'll look like thick fries. Dust them lightly with salt and pepper on both sides.
- Create your breading station:
- Line up three shallow bowls: flour in the first, beaten eggs mixed with milk in the second, and panko combined with Parmesan, garlic powder, and Italian seasoning in the third. This assembly line approach keeps things organized and stops you from getting confused halfway through.
- Coat each strip:
- Take a chicken strip, roll it in flour until covered, shake off the excess, then dunk it in egg, and finally press it into the panko mixture, making sure every side gets coated. Don't rush this—a thorough coating is what separates crispy from soggy.
- Arrange and oil:
- Lay your breaded strips in a single layer on the prepared sheet without crowding them. Give them a light spray or drizzle of oil on top; this is the secret to that golden, crispy exterior.
- Bake until golden:
- Slide them into the oven for 20 to 25 minutes, flipping halfway through so both sides brown evenly. They're done when they're golden and an instant-read thermometer reads 165°F at the thickest part.
- Serve right away:
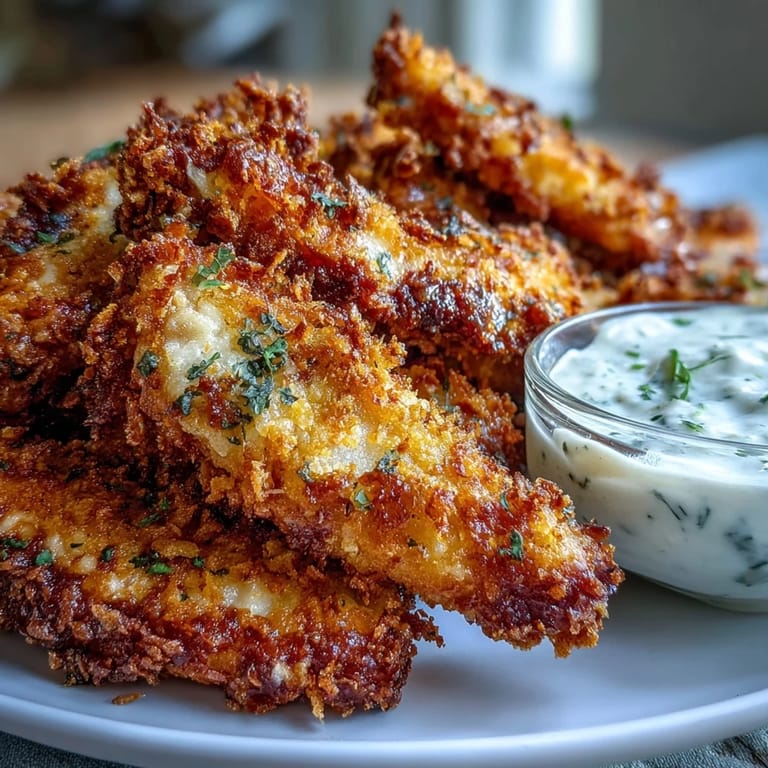
- Pull them out while they're still hot and crispy, arrange them fry-style on a plate, and set out your warm marinara and cool ranch for dipping.
 Save to Pinterest
 There's something oddly satisfying about watching someone dunk one of these into marinara, then into ranch, and just lose themselves in the simple pleasure of it. That's when I realized this recipe isn't really about following instructions perfectly—it's about creating something warm and crunchy that makes people slow down and enjoy the moment.
The Secret to Perfect Crunch
The moment I started using panko instead of regular breadcrumbs, everything changed. Panko granules are larger and fluffier, which means they crisp up faster and create air pockets that stay crispy even after sitting for a few minutes. The oil spray on top is equally important—it browns the coating and keeps it from absorbing moisture from the chicken while it cooks. These two things together create that restaurant-quality texture that makes people ask for the recipe.
Making It Your Own
I've experimented with this recipe enough times to know where you can get creative and where you need to stay strict. The breading technique is fixed—that three-bowl station works because each layer does a specific job. But everything else is fair game for your preferences and what you have on hand. Some nights I add red pepper flakes to the breadcrumb mixture if I'm in the mood for heat, other times I use herb-seasoned panko and skip the Italian seasoning.
Timing and Storage Tips
The beauty of this recipe is that you can bread the chicken strips an hour or two ahead and keep them in the fridge until you're ready to bake. This means you can prep when life is calm, then cook when hunger strikes. Leftovers last about three days in an airtight container, and they're honestly good cold straight from the fridge the next day, though they're best reheated in a 350°F oven for five minutes to restore some crispness.
- If you're cooking for a crowd, you can double the batch and use two baking sheets, rotating them halfway through.
- Don't thaw frozen chicken strips before breading—they'll be too wet and the coating will slide off.
- Keep your dips at room temperature or slightly warmed, because cold dips on hot chicken is the kind of contrast that makes these addictive.
 Save to Pinterest
 These chicken fries have become the kind of dish I make when I want to feel like I'm taking care of the people around me without spending hours in the kitchen. There's real comfort in that simplicity.
Recipe FAQs
- → What makes these chicken fries crispy without frying?
The combination of panko breadcrumbs and Parmesan cheese creates a light, crispy coating that browns beautifully in the oven. Spraying with olive oil before baking helps achieve that golden crunch.
- → Can I make these ahead of time?
You can bread the chicken strips up to 4 hours ahead and refrigerate, then bake when ready. For leftovers, reheat at 200°C (400°F) for 10 minutes to restore crispiness.
- → What dipping sauces work best?
Warm marinara sauce provides the classic Italian-American pairing, while cool ranch balances the seasoned coating. Try garlic aioli or spicy arrabbiata for variation.
- → How do I know when the chicken is fully cooked?
The internal temperature should reach 74°C (165°F) when measured with a meat thermometer. Visual cues include golden-brown coating and juices running clear when pierced.
- → Can I make this gluten-free?
Yes, substitute gluten-free all-purpose flour and gluten-free panko breadcrumbs. The texture and crunch will remain excellent with these simple swaps.
- → What's the best way to cut the chicken into strips?
Slice against the grain into uniform 1/2-inch strips for even cooking. Partially freezing the chicken for 15 minutes makes it easier to cut clean, even pieces.