 Save to Pinterest
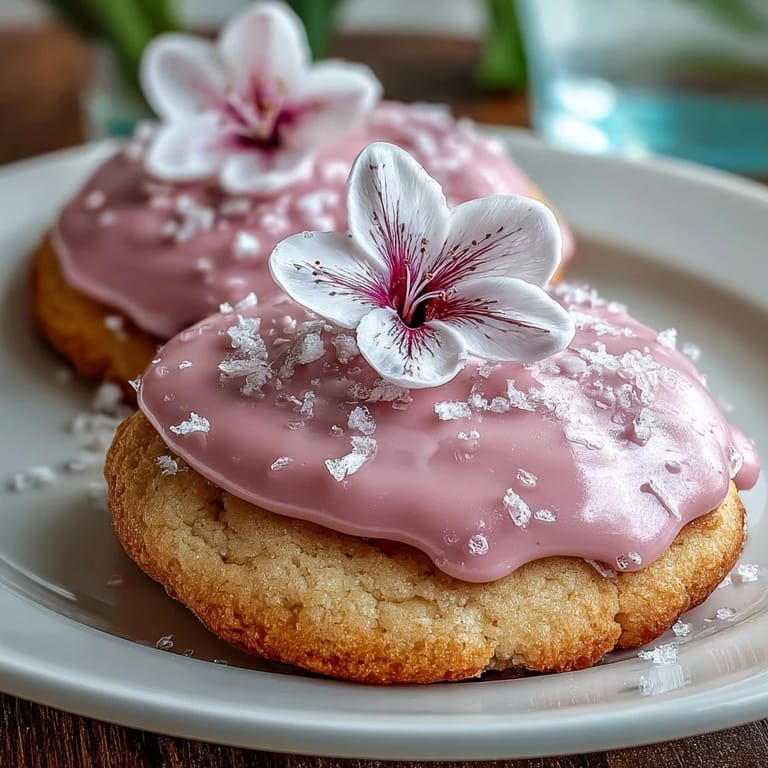
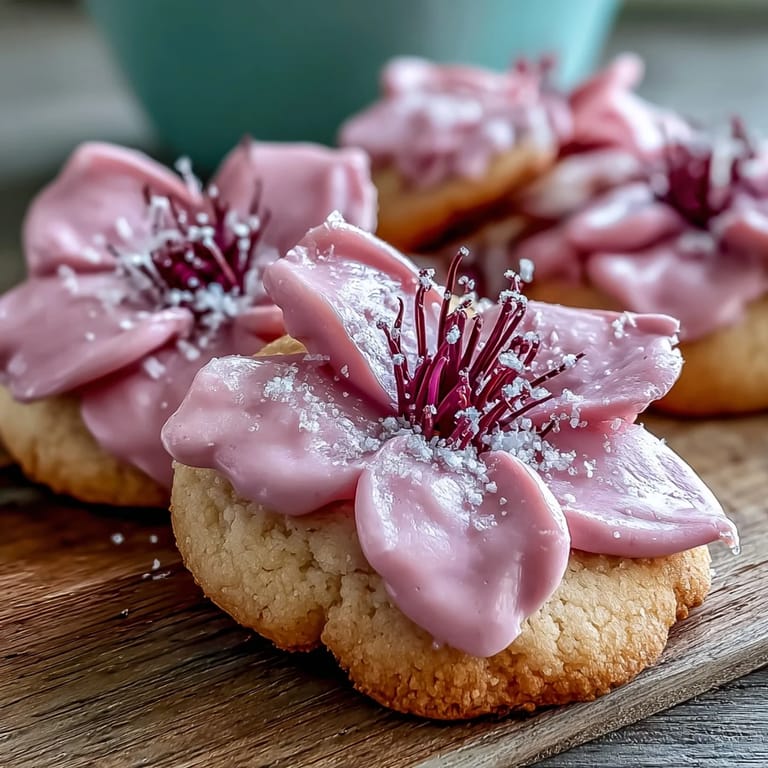
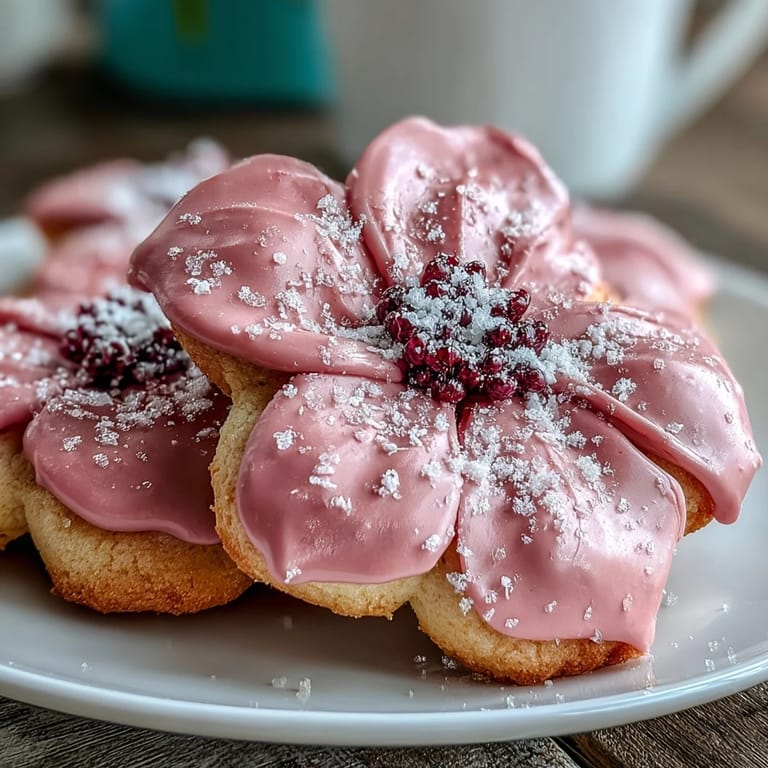
 My sister called me in a panic two weeks before her baby shower, asking if I could make something special that wouldn't feel heavy on a spring afternoon. I'd never decorated cookies with royal icing before, but something about the idea of painting delicate flowers onto butter cookies felt right for celebrating new life. The first batch came out slightly lopsided, but when I tinted the icing in soft pastels and started piping petals, I realized I was creating tiny edible gardens. Those cookies became the unexpected star of the shower, and now they're my go-to when I want to bring something that tastes as thoughtful as it looks.
I remember standing in my kitchen at sunrise on the morning of the shower, piping tiny dots and strokes onto each cookie while my coffee grew cold beside me. There was something meditative about it, even with my hands shaking from caffeine and nerves. By the time my sister arrived to pick them up, I'd created an entire pastel garden, and she actually teared up a little when she saw them arranged on the table.
Ingredients
- All-purpose flour: The foundation that gives these cookies their tender crumb—don't skip sifting your flour if it's been sitting in the cupboard for a while, or your dough might be tougher than intended.
- Unsalted butter, softened: This is your secret to that melt-in-your-mouth quality; make sure it's truly soft by leaving it on the counter for about an hour before you start.
- Granulated sugar: Creates structure and sweetness without any bitterness that might overpower the delicate vanilla.
- Large egg: Binds everything together and helps the cookies hold their shape during rolling and cutting.
- Pure vanilla extract: Use the real stuff here—it makes such a difference when you taste the baked cookie without competing flavors.
- Powdered sugar, sifted: Essential for smooth royal icing; lumpy powdered sugar will leave your decorations grainy and frustrating to look at.
- Meringue powder: The ingredient that makes royal icing glossy and structurally perfect for piping details.
- Food coloring gels: Gel colors are more concentrated than liquid, so they won't water down your icing like the little bottles do.
Tired of Takeout? 🥡
Get 10 meals you can make faster than delivery arrives. Seriously.
One email. No spam. Unsubscribe anytime.
Instructions
- Mix your dry base:
- Whisk flour, baking powder, and salt together in a medium bowl, making sure the baking powder is evenly distributed so every bite rises slightly and stays tender. This takes about a minute, and it's worth doing carefully rather than rushing.
- Cream butter and sugar until fluffy:
- Beat them together for 2 to 3 minutes until the mixture goes from pale yellow to almost white and feels airy when you lift the beaters—this is where your cookies get their tender structure. You'll actually see the texture change, which is the fun part.
- Add egg and vanilla:
- Beat them in until the mixture looks smooth and slightly thicker, then scrape down the bowl because there's always that stubborn bit clinging to the sides. This should take about another minute.
- Combine wet and dry:
- Add your flour mixture gradually while mixing on low speed, stopping as soon as everything comes together—overworking this dough will make your cookies tough and dense. You want to see just a few flour streaks disappear before you stop.
- Chill the dough:
- Divide into discs, wrap tightly, and refrigerate for at least an hour while you do something else; cold dough is forgiving and won't spread all over your baking sheet. This is the perfect time to clean up or do laundry.
- Preheat and prepare:
- Get your oven to 350°F and line baking sheets with parchment paper so your cookies don't stick and brown unevenly. A cold baking sheet makes a difference too.
- Roll and cut:
- On a lightly floured surface, roll one dough disc to 1/4-inch thickness and use your flower cutter to create shapes, gathering scraps gently to re-roll rather than pressing them back together aggressively. The more carefully you handle the dough, the more tender your final cookies.
- Space and bake:
- Arrange cookies an inch apart on your prepared sheets and bake for 10 to 12 minutes until the edges just barely turn golden—they should still feel slightly soft in the middle. They'll continue cooking from residual heat after you pull them out.
- Cool with patience:
- Let them sit on the baking sheet for 5 minutes so they firm up slightly, then transfer to a cooling rack where they'll cool completely in about 20 minutes. Don't skip this step or icing will melt into puddles.
- Prepare royal icing:
- Combine sifted powdered sugar and meringue powder, then add water one tablespoon at a time until your icing reaches that perfect thick-but-spreadable consistency. It should look glossy and coat a spoon without running off.
- Tint and decorate:
- Divide icing into small bowls and add tiny amounts of gel coloring—you can always add more color but you can't take it out—then spread or pipe onto cooled cookies. Let it set completely, which takes about 2 to 3 hours, before you stack or package anything.
 Save to Pinterest
 There's a moment when you frost your first batch and step back to see what you've made that feels almost magic. These little flower cookies stopped being just ingredients at that point—they became gifts, celebrations, tiny pieces of joy that people actually don't want to eat because they're too pretty.
The Secret to Tender Cookies
The real magic here isn't in any single ingredient—it's in not overworking your dough. I learned this the hard way when I made a second batch and got impatient with mixing, trying to rush it all together in thirty seconds. Those cookies turned out dense and crumbly, and I realized that gentle folding and patience make the difference between a cookie that melts and one that just sits there. Every time I mix now, I stop myself and count to make sure I'm not overdoing it.
Decorating Like You Mean It
Piping royal icing isn't some fancy skill—it's just practice and patience with a piping bag. I used a basic round tip the first time and was shocked at how much control I had; the icing flows exactly where you guide it. If you don't own piping bags, you can put icing in a small zip-top bag and snip off a corner, which works just as well.
Flavor Variations and Storage
These cookies are blank canvases for whatever flavor you want to explore. I've added almond extract for a delicate nod to marzipan, and once I tried lemon zest which turned them into something totally different and equally lovely. Storage is simple too—they keep in an airtight container for up to five days, though they rarely last that long in my house.
- Try adding a tiny pinch of almond extract to your dough for an unexpected floral undertone that pairs beautifully with pastel icing.
- Keep decorated cookies in a single layer in a sturdy container so the icing doesn't smudge or crack.
- You can bake these up to two days ahead and decorate them the morning of your event, which spreads out the work and stress.
 Save to Pinterest
 Make these cookies when you need to slow down and create something with your hands, or when you want to show up to something special with food that took real thought and care. They're small enough to share but meaningful enough that people actually remember them.
Recipe FAQs
- → How do I achieve the perfect flower shape?
Chill the dough thoroughly before rolling it out to ensure clean cuts. Use a sharp flower-shaped cutter and avoid pressing too hard to maintain delicate edges.
- → What is the best method for pastel royal icing?
Mix powdered sugar with meringue powder and water until thick but spreadable. Divide and tint with pastel food gels. Pipe or spread gently on cooled cookies.
- → Can I prepare the dough in advance?
Yes, the dough can be wrapped and chilled for up to 24 hours to enhance the flavor and ease handling.
- → What are good beverage pairings for these cookies?
Herbal teas like chamomile or a sparkling lemonade complement the buttery sweetness and pastel decoration beautifully.
- → Is there a way to make these cookies dairy-free?
Substitute the unsalted butter with a plant-based alternative to make these treats suitable for dairy-free diets without compromising texture.