 Save to Pinterest
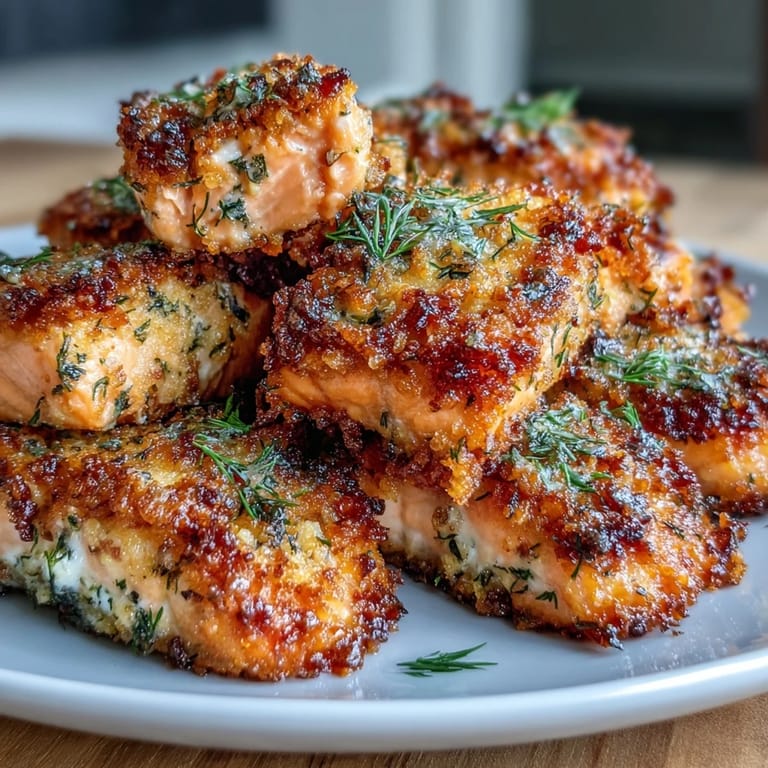
 My neighbor surprised me with a bag of beautiful salmon filets one afternoon, and I had maybe twenty minutes before friends were coming over. Instead of panicking, I remembered watching someone bread fish at a seafood counter years ago—that quick, confident dredge-dip-coat motion. I chopped the salmon into bite-sized pieces, set up my three bowls like I was conducting an orchestra, and forty minutes later, I was pulling golden, crispy salmon bites from the oven while my guests were still parking their cars.
There's something about watching someone's face light up when they bite into something warm and crispy that they didn't expect to be restaurant-quality. A friend who usually orders takeout ate three of these in a row and asked if I'd been holding out on them all these years. That moment made me realize good food doesn't require complicated techniques, just a little attention and the willingness to bread something properly.
Ingredients
- Salmon filet, 1 lb, cut into 1-inch pieces: Look for wild-caught if you can, but honestly, quality varies more by your fishmonger than the label. Make sure the pieces are roughly the same size so they cook evenly without any dry edges.
- All-purpose flour, 1/4 cup: This is your base layer that helps everything stick, so don't skip it even though it seems small.
- Kosher salt, 1 tsp total (split between flour and panko): Kosher salt has larger crystals that dissolve slower, giving you better seasoning control than table salt.
- Egg, 1, beaten, plus 2 tsp Dijon mustard: The mustard adds tang and helps the panko adhere better than egg alone, plus it whispers sophistication without announcing itself.
- Panko breadcrumbs, 1 cup: Japanese panko is coarser and stays crunchier longer than regular breadcrumbs, and it's worth seeking out if your store carries it.
- Onion powder, garlic powder, dried dill, dried parsley, 1/2 tsp each: These aromatics are the difference between plain breaded salmon and something your guests will actually remember.
- Olive oil or cooking spray: Use whatever you have, but a light coating prevents sticking without making the bites greasy.
Tired of Takeout? 🥡
Get 10 meals you can make faster than delivery arrives. Seriously.
One email. No spam. Unsubscribe anytime.
Instructions
- Get your oven ready and set up your station:
- Preheat to 400°F and line your baking sheet with parchment paper, then give it a light spray. The parchment is non-negotiable because it stops the panko from sticking and burning on the bottom.
- Dry your salmon pieces thoroughly:
- Pat them with paper towels until they feel almost dry to the touch. Any moisture will make the flour slip off instead of adhering, and you'll regret it halfway through.
- Assemble your three-bowl breading station:
- Bowl one gets flour mixed with salt. Bowl two is egg whisked with Dijon mustard. Bowl three combines panko with all your dried herbs, onion powder, garlic powder, and more salt. Arrange them left to right in the order you'll use them.
- Bread each piece one at a time with intention:
- Drop a salmon bite in the flour, shake it around until every surface is dusted, then tap it gently to remove the excess. Dip it in the egg mixture, making sure it's fully coated, then press it firmly into the panko, turning it so all sides get crispy coverage.
- Let the coated pieces rest for five minutes:
- This pause lets the coating set and adhere properly, so it doesn't fall apart during cooking.
- Arrange your bites on the baking sheet with space between them:
- They need breathing room or they'll steam instead of bake, and you want that golden, crispy exterior.
- Bake for ten minutes until the panko starts turning golden:
- The salmon won't be fully cooked yet, and that's intentional. You're building layers of crispness here.
- Switch to broil, flip each piece, and finish for two to three minutes:
- Watch them closely because broilers are like temperamental artists—they can go from golden to burnt in about thirty seconds. You want the tops bronzed and crackling.
- Serve immediately while they're still warm and crunchy:
- Dipping sauce is optional but encouraged, whether that's tartar sauce, lemon wedges, or a cool yogurt-dill situation.
 Save to Pinterest
 I made these one autumn evening when my daughter wanted to help in the kitchen, and she was fascinated by the three-bowl setup. She called it my breading assembly line, and watching her carefully dip and press each piece with such concentration made me realize these aren't just appetizers—they're an invitation to slow down and do something together. Now whenever she asks to cook, she specifically requests the salmon bites.
Why Panko Matters More Than You Think
Regular breadcrumbs are fine, but they're fine in the way plain vanilla is fine. Panko breadcrumbs have a rougher, airier texture because they're made from a different kind of bread, and that means they fry up exponentially crunchier. The first time I switched to actual Japanese panko instead of the generic stuff, I understood why restaurants charge more for breaded items. Your teeth actually crack through the coating before reaching the tender salmon, and that contrast is honestly what makes people reach for seconds.
The Secret Power of Dijon Mustard in Egg Wash
Most recipes just whisk egg for their wash, but adding Dijon mustard does three things simultaneously. It helps the panko stick better because it's thicker than plain egg. It adds a subtle savory note that makes people pause and try to figure out what makes these taste more interesting than regular fried fish. And it brings a slight tang that cuts through richness without announcing itself, which is the mark of cooking that knows what it's doing.
Beyond the Oven: Storage, Timing, and Variations
These bites are best served straight from the oven when the panko is still shattering under your teeth, but life isn't always that convenient. You can bread them in advance and keep them on a parchment-lined tray in the fridge for up to eight hours before baking, which makes them perfect for meal prep or unexpected guests. For flavor variations, try adding a pinch of smoked paprika to the panko mixture, or mix in some finely grated lemon zest if you want brightness without the wetness of fresh juice.
- Air fryer alternative: Cook at 400°F for 8 to 10 minutes for an even crispier result with less oil.
- Freeze cooked bites in an airtight container for up to three months and reheat in a 350°F oven for 5 to 7 minutes.
- Pair with lemon wedges, tartar sauce, or a yogurt-dill dip for dipping contrast.
 Save to Pinterest
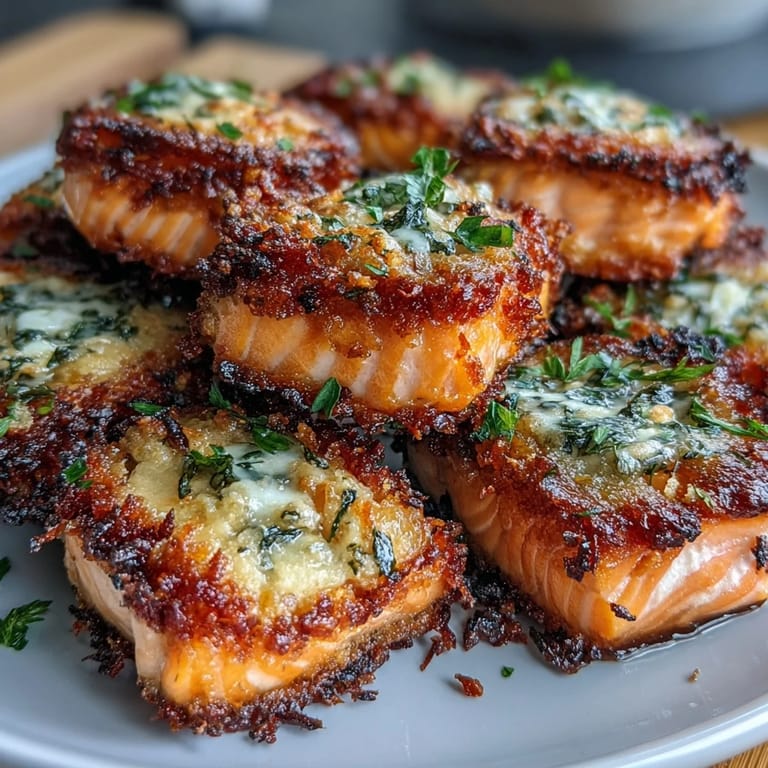
 These salmon bites taught me that the best recipes aren't about fancy techniques or exotic ingredients—they're about respecting each component and putting them together with intention. Make them once, and you'll find yourself reaching for this recipe whenever you want something that tastes like you spent hours in the kitchen when really, you spent twenty minutes being deliberate.
Recipe FAQs
- → What type of salmon works best for the bites?
Fresh salmon filet cut into bite-sized pieces provides the best texture and flavor.
- → Can I use gluten-free breadcrumbs for the coating?
Yes, gluten-free panko breadcrumbs can be substituted to accommodate dietary needs without compromising crunch.
- → Why is the egg mixed with Dijon mustard in the coating process?
The mustard adds subtle tang while helping the panko crumbs adhere evenly to the salmon pieces.
- → Is it possible to cook these bites without an oven?
They can be prepared in an air fryer at 400°F for 8–10 minutes, resulting in a similar crispy texture.
- → What are recommended dipping options for serving?
Lemon wedges, tartar sauce, or a yogurt-dill dip complement the salmon bites’ flavors beautifully.