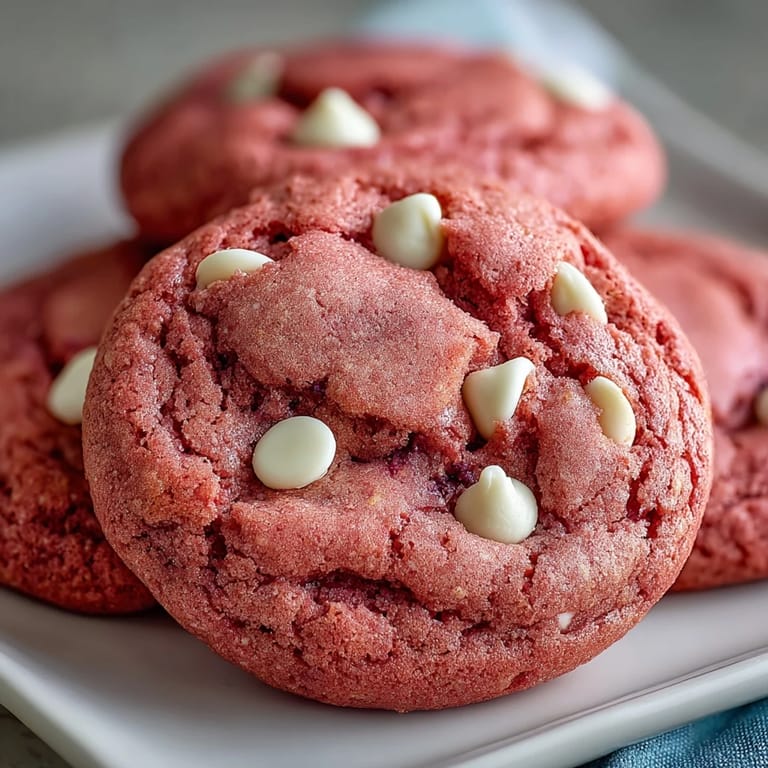
 Save to Pinterest
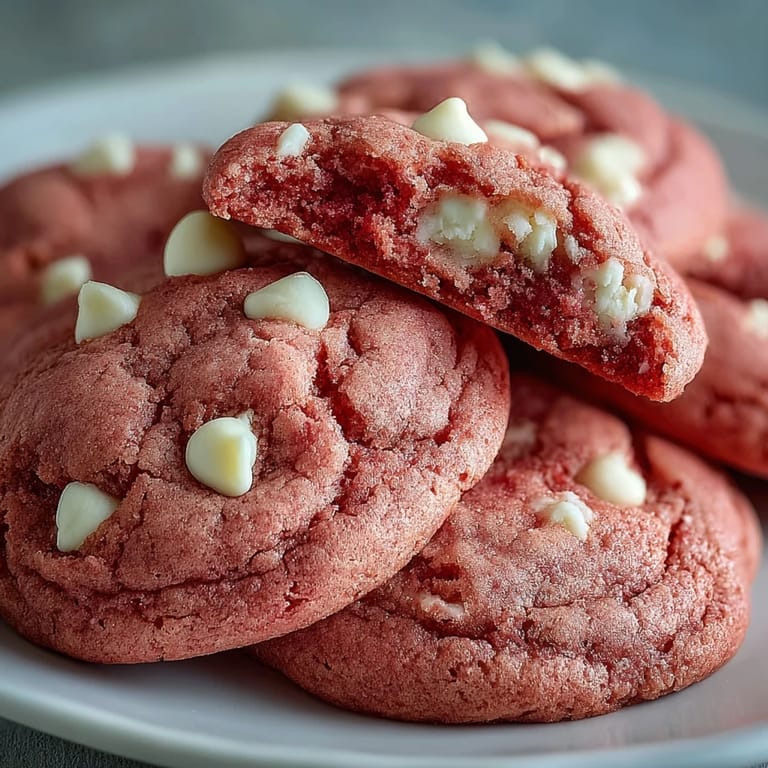
 The day I decided pink cookies needed to exist in my kitchen, I had no idea what I was doing. I'd seen those gorgeous bakery photos with impossibly vibrant colors and thought, how hard can this be? Turns out, getting that perfect shade without compromising texture is its own adventure. My first batch came out an embarrassing pale coral, but they tasted so good nobody minded. Now I know exactly how to achieve that stunning velvet pink that makes people do a double-take.
I brought a batch to my niece's birthday party last spring and watched her face light up when she saw them. She'd been having a rough week at school, and something about those cheerful pink cookies just turned her whole day around. Now every time I make them, I think about how food can be such a simple form of joy. Her little cousin promptly asked if I could make them blue for his birthday, and honestly, I might just have to.
Ingredients
- All-purpose flour: The backbone of your cookie structure, providing that perfect chewy-crispy foundation we all love
- Baking powder and baking soda: This dynamic duo gives your cookies just the right amount of lift without making them cakey
- Salt: Dont skip it, it makes all the flavors pop and balances the sweetness
- Unsalted butter: Softened to room temperature so it creams beautifully with the sugar, creating those tender pockets we crave
- Granulated sugar: Creates that gorgeous crackly top while keeping centers soft and pillowy
- Large egg: Binds everything together while adding richness and structure
- Vanilla extract: Pure vanilla is worth every penny here, it's the flavor foundation that makes people ask what your secret is
- Pink gel food coloring: Gel coloring is concentrated so it wont throw off your dough consistency, unlike liquid versions
- White chocolate chips: They melt into gorgeous puddles and provide creamy contrast to the vanilla cookie base
Tired of Takeout? 🥡
Get 10 meals you can make faster than delivery arrives. Seriously.
One email. No spam. Unsubscribe anytime.
Instructions
- Whisk your dry ingredients:
- In a medium bowl, combine the flour, baking powder, baking soda, and salt until everything is evenly distributed. This step prevents overmixing later and ensures every cookie bakes up perfectly uniform.
- Cream the butter and sugar:
- Beat the softened butter and sugar together for a full 2 to 3 minutes until the mixture turns pale and fluffy. You're literally whipping air into the dough, which is what gives these cookies their irresistible texture.
- Add the wet ingredients:
- Mix in the egg and vanilla extract until the mixture looks glossy and smooth. Add your pink gel coloring drop by drop until you reach that vibrant shade that makes you smile.
- Combine everything:
- Pour in the dry ingredients and mix on low speed just until you no longer see streaks of flour. Overmixing at this stage will make your cookies tough, so trust the process and stop as soon as everything comes together.
- Fold in the white chocolate:
- Gently incorporate the chips by hand with a spatula, being careful not to overwork the dough. Those pockets of white chocolate are what make every bite special.
- Chill the dough:
- Cover the bowl and refrigerate for 30 minutes minimum, though an hour is even better. This step is non-negotiable, it keeps the cookies from spreading too much and intensifies the flavor.
- Prep your oven:
- Heat your oven to 350°F and line two baking sheets with parchment paper. The parchment prevents sticking and makes cleanup absolutely effortless.
- Portion the dough:
- Scoop generous tablespoon-sized balls and place them about 2 inches apart on your prepared sheets. They need room to spread without merging into one giant cookie.
- Bake to perfection:
- Slide them into the oven for 10 to 12 minutes until the edges look set but centers still appear slightly underdone. That soft center is exactly what you want, theyll firm up beautifully as they cool.
- Cool completely:
- Let them rest on the baking sheets for 5 minutes before moving them to a wire rack. This patience pays off with cookies that have the perfect texture throughout.
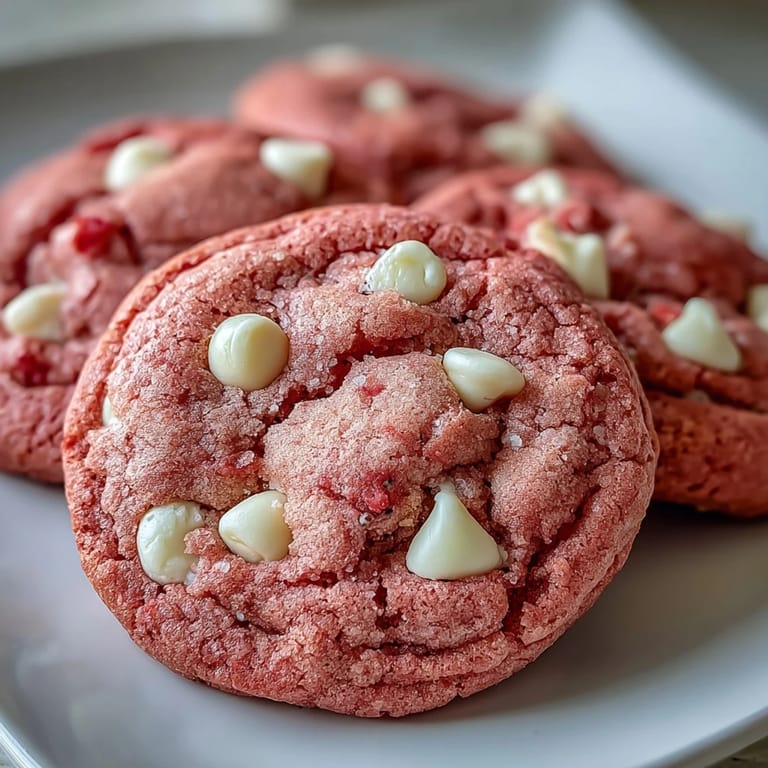
 Save to Pinterest
 My neighbor texted me at 11 PM one night asking for the recipe after she smelled them baking through our shared wall. We ended up sitting on her front steps in our pajamas, eating warm cookies and talking about everything and nothing. Sometimes the best moments happen over something as simple as a freshly baked pink cookie.
Getting That Perfect Pink Color
I've learned through trial and error that gel coloring behaves completely differently than the liquid stuff from the grocery store. Start with less than you think you need, you can always add more but you cant take it back. The color will deepen slightly as the cookies bake, so aim for a shade or two lighter than your ideal final color. And if you accidentally go too dark, just call them rose velvet cookies and pretend that was the plan all along.
The White Chocolate Secret
Not all white chocolate chips are created equal, and I learned this the hard way with several disappointing batches. Look for chips that list cocoa butter as an ingredient, not palm oil or other vegetable fats. Real white chocolate melts better, tastes creamier, and distributes more evenly throughout your dough. I keep a small stash of high-quality chips specifically for these cookies because the difference is genuinely that noticeable.
Storage and Make-Ahead Tips
These cookies actually taste better the next day, if you can manage to keep them around that long. The flavors meld together beautifully and the texture becomes even more chewy and satisfying. You can scoop and freeze the raw dough balls for up to three months, baking them straight from frozen and adding just 1 to 2 minutes to the baking time. I always keep a emergency stash in my freezer for those days when homemade cookies are the only thing that will fix the mood.
- Layer cookies between parchment paper in an airtight container to prevent them from sticking together
- A slightly cooled oven with the door propped open is perfect for refreshing day-old cookies to that just-baked texture
- If freezing dough, flash-freeze the balls on a baking sheet first before transferring to a freezer bag
 Save to Pinterest
 There's something undeniably cheerful about a plate of pink cookies, and they've become my go-to for whenever someone needs a little brightness in their day. Hope they bring as many smiles to your kitchen as they have to mine.
Recipe FAQs
- → What gives these cookies their vibrant pink color?
The signature vibrant pink hue comes from incorporating pink gel food coloring into the dough. You can adjust the amount to achieve your desired shade without affecting the texture.
- → Why is chilling the dough important for this bake?
Chilling the dough for 30 minutes helps solidify the butter, which prevents the cookies from spreading too much in the oven. It ensures they hold their shape and develop a thicker, chewier texture.
- → Can I prepare the dough in advance?
Absolutely! You can prepare the dough up to 2-3 days in advance and keep it covered in the refrigerator. Let it sit at room temperature for about 10-15 minutes before scooping and baking if it's too firm.
- → What are some ways to customize these treats?
Beyond white chocolate chips, you could fold in chopped nuts or sprinkles. For enhanced flavor, try adding a hint of almond extract or rose water to the dough. They're also excellent as cookie sandwiches with cream cheese frosting.
- → How should I store baked cookies to maintain freshness?
Once completely cooled, store these delectable items in an airtight container at room temperature for up to one week. For longer storage, they can be frozen for up to 3 months, then thawed at room temperature.
- → Is there a gluten-free option for this recipe?
Yes, you can easily make these gluten-free by substituting the all-purpose flour with a 1:1 gluten-free flour blend. Ensure your blend contains xanthan gum for best results to maintain texture.