 Save to Pinterest
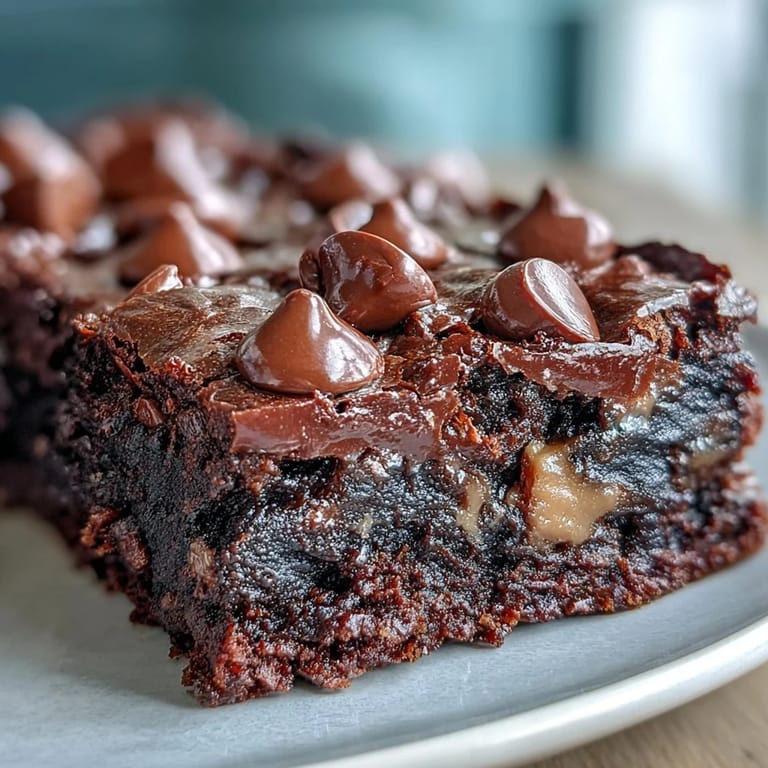
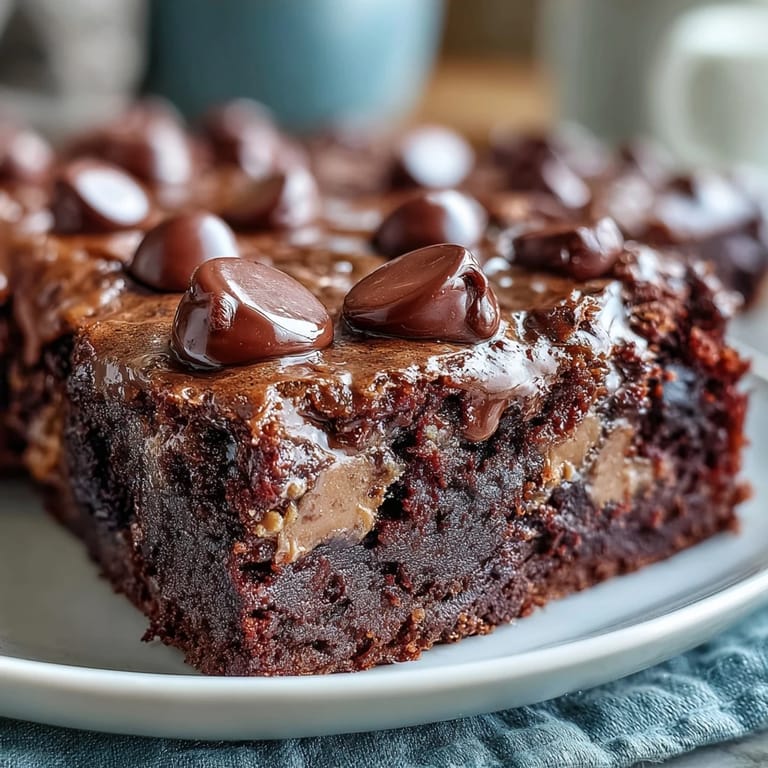
 The first time I made this dump cake for a potluck, my friend Sarah literally stopped mid conversation, fork frozen in midair, and asked what kind of magic was happening in that pan. The way the peanut butter creates this incredible molten layer at the bottom while the cake bakes up around the chocolate cups is something you really have to experience to understand.
I made this the night before my daughters birthday party because I was too exhausted to bake anything complicated, and woke up to the most incredible smell filling the entire house. The birthday girl liked it so much she requested it again the following year, which is basically the highest review a parent can get.
Ingredients
- Devils food chocolate cake mix: This creates the perfect not too sweet foundation that balances all that peanut butter richness
- Creamy peanut butter: Room temperature is crucial here as cold peanut butter wont spread evenly and youll get uneven layers
- Unsalted butter melted: Using unsalted lets you control the salt level since peanut butter already has plenty
- Whole milk: The higher fat content makes for a more tender crumb than skim or plant milks
- Mini peanut butter cups: Minis distribute more evenly than full sized cups and create more chocolate peanut butter pockets throughout
- Semi sweet chocolate chips: These help balance the sweetness from the peanut butter cups and cake mix
Tired of Takeout? 🥡
Get 10 meals you can make faster than delivery arrives. Seriously.
One email. No spam. Unsubscribe anytime.
Instructions
- Preheat and prep your baking dish:
- Set your oven to 350F and give a 9x13 inch pan a thorough coating of nonstick spray, paying special attention to the corners
- Create the peanut butter foundation:
- Spread your room temperature peanut butter in an even layer across the bottom of the dish, using an offset spatula if you have one
- Whisk together the cake batter:
- Combine the cake mix, melted butter, and milk in a large bowl, whisking until mostly smooth with tiny lumps still visible
- Layer the batter carefully:
- Pour the chocolate batter over the peanut butter layer as gently as possible so they dont get too mixed together
- Add the chocolate treasures:
- Scatter the mini peanut butter cups and chocolate chips across the surface, pressing them in slightly so they dont roll off
- Bake until set:
- Slide the dish into the oven and bake for 35 to 40 minutes until the center is mostly set with just a tiny bit of wobble
- Let it rest before serving:
- Cool for at least 15 minutes so the peanut butter layer can firm up slightly, though it will still be gloriously gooey
 Save to Pinterest
 My husband who usually avoids overly sweet desserts went back for thirds the first time I served this, claiming he was just helping me finish it off. Watching peoples faces when they hit that first pocket of melted peanut butter cup has become my favorite part of making this recipe.
Getting The Right Texture
The key to this recipes magic is in the layering technique. The peanut butter sinks slightly while the cake rises around it, creating those distinct layers that make each bite so interesting. Resist the urge to swirl them together, they need to remain separate for the full effect.
Serving Suggestions
While this is fantastic on its own, a scoop of cold vanilla ice cream creates the most incredible temperature contrast. The warm cake meets cold cream, and the combination is honestly worth the extra dishes.
Make It Your Own
Once youve made this a few times, youll start thinking about variations. The basic formula of peanut butter layer, cake batter, and chocolate toppings works with endless combinations.
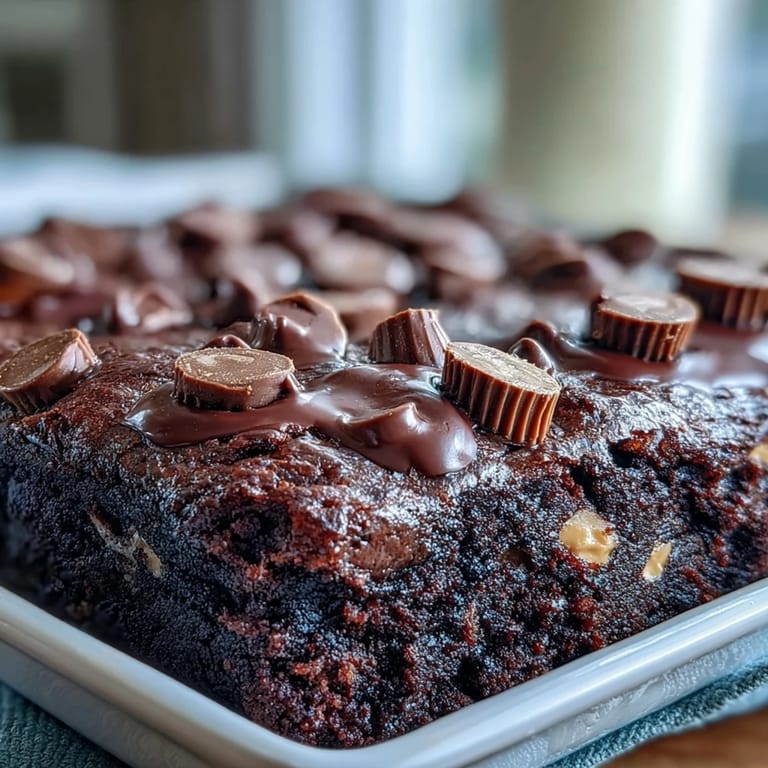
- Try chopped Reese cups instead of minis for bigger chunks
- Add a handful of salted peanuts on top for that sweet salty crunch
- Swap the cake mix for chocolate fudge brownie mix for something even more intense
 Save to Pinterest
 This is the dessert that shows up at every family gathering now, and I honestly dont mind because its become everyones favorite way to end a meal together.
Recipe FAQs
- → Can I use natural peanut butter instead of creamy?
Natural peanut butter can work, but creamy peanut butter spreads more evenly and creates a better texture. Natural varieties tend to be oilier and may separate during baking.
- → How do I know when it's done baking?
The cake is done when the top is set and a toothpick inserted into the center comes out with moist crumbs but not wet batter. The edges should pull away slightly from the pan.
- → Can I make this ahead of time?
Yes! You can make this up to 24 hours in advance. It actually tastes better the next day as the flavors meld together. Store covered at room temperature or refrigerate for longer keeping.
- → What's the best way to serve this?
It's delicious served warm with a scoop of vanilla ice cream. The warm cake and cold cream create the perfect temperature contrast. You can also serve it at room temperature for easier slicing.
- → Can I freeze leftovers?
Absolutely! Cut into portions, wrap individually in plastic and foil, then freeze for up to 3 months. Thaw at room temperature or warm in the microwave for that fresh-baked taste.
- → Can I use a different cake mix flavor?
While chocolate is traditional, you can experiment with vanilla, spice, or red velvet cake mix. Just keep in mind that chocolate pairs best with peanut butter for the classic flavor combination.